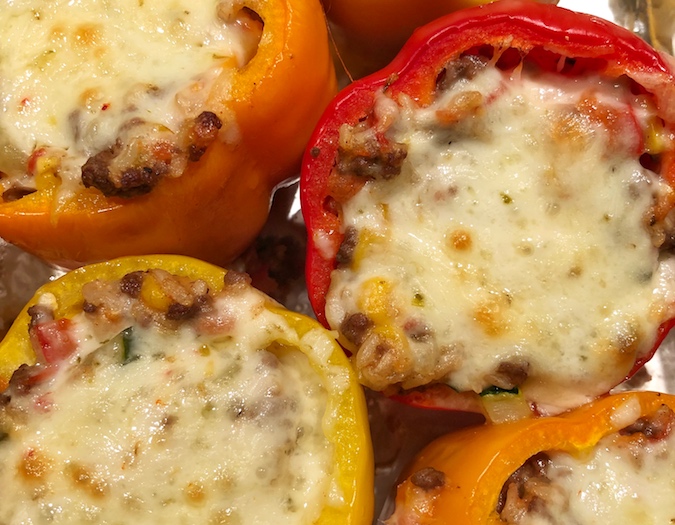
Best Stuffed Peppers
Traditional stuffed peppers filled with flavorful ground beef, rice, tomato sauce, and gooey cheese—satisfying, popular, and simple enough for a weekday evening.
Nearly every culinary tradition features its own take on stuffed peppers—bell peppers packed with various mixtures of meat, tomato sauce, vegetables, rice, and cheese. In the U.S., the dish is unmistakably vintage (the most sought-after recipe online remains the one from Betty Crocker!). In this version of the classic recipe, I've made a slight enhancement by swiftly tenderizing the beef prior to cooking and adding Southwestern spices, which complement the sweetness of the bell peppers beautifully. That being noted, the recipe is incredibly adaptable—you can change the meat, spices, grain, or cheese to create an entirely different variation. I enjoy serving this variation alongside cornbread.
The peppers require some time in the oven to ensure they are fully cooked. Many recipes suggest boiling them initially, but I favor roasting—better taste, easier cleanup! Simply cut the peppers in half lengthwise, remove the seeds and membranes, and roast them until they're tender-crisp.
"These stuffed peppers are so delicious that I was asked to prepare them for dinner two times in one week!" And there were remnants in the middle!"
Ingredients Required for Preparing Stuffed Peppers
Choose bell peppers that are vibrant, glossy, and solid. They must not display wrinkled skin, soft areas, or moldy stems. I favor red, orange, or yellow peppers; green ones are immature and possess an undesirable, slightly bitter flavor. If allowed to fully mature, green peppers will eventually change to a different color, and their taste will grow progressively sweeter. Bell peppers can last for as long as a week in the refrigerator's crisper drawer.
Guidelines to Follow
Step 1: Soften the beef. In a medium-sized bowl, mix the beef with 1 teaspoon of salt and the baking soda. Combine it with your hands until well blended, then allow it to rest for 20 minutes while you prepare the other parts of the recipe. The baking soda performs its function during this period—it increases the pH, aiding the beef in remaining tender and moist as it cooks. I apply this tenderizing method in various ground beef dishes, such as beef enchiladas, beef chili, and shepherd’s pie.
Step 2: Get the peppers ready. Cut the peppers in half lengthwise, then remove the seeds and membranes using your hands or a small knife.
Step 3: Pre-cook the peppers. Arrange the pepper halves with the cut sides facing up in a 9×13-inch baking dish. Pour 1 tablespoon of the oil and add the rest of the salt. Bake for approximately 20 minutes, until they begin to brown and are soft yet still maintain their form. Don’t be concerned if some liquid accumulates in the peppers—that’s perfectly normal.
Paso 4: Preparar el relleno. In the meantime, warm the other 2 tablespoons of oil on medium heat in a big nonstick frying pan. Incorporate the onion and sauté, stirring often, until it becomes soft and translucent, about 3 to 4 minutes. Incorporate the garlic and sauté for an additional minute; avoid browning.
In the skillet, combine the ground beef mixture with chili powder, cumin, and oregano, then raise the heat to medium high.
Cook, using a wooden spoon to break up the meat, until it is browned and nearly cooked through, approximately 5 minutes. Incorporate the tomato sauce and allow it to reach a boiling point.
Lower the heat to medium low and simmer, uncovered, for 2 to 3 minutes until the meat is fully cooked. Incorporate the cooked rice along with 3/4 cup of the cheese.
Mix until dissolved and take the skillet off the heat.
Step 5: Stuff the peppers. Remove the peppers from the oven and distribute the meat filling evenly inside each one. Dust the surfaces with the leftover ¾ cup of cheese.
Step 6: Cook in the oven. Place the stuffed peppers back in the oven and bake for 10 to 15 minutes, or until the filling is warm and the cheese is melted and bubbly. Serve heated and savor!
Hearty, satisfying, and consistently popular—these filled peppers are simple to prepare, ideal for leftovers, and suitable for freezing as well.
Gluten-Free Modifiable Note
As far as I know, every ingredient in this recipe is either gluten-free or commonly found in gluten-free alternatives. Many foods contain hidden gluten; if you’re on a gluten-free diet or preparing meals for someone with gluten allergies, always check the ingredient labels to ensure they are gluten-free.
Explore additional recipes:
Beef, Lamb, Veal & Pork Supper Gluten-Free Adjustable Tex-Mex

Fixings
- 1/2 c. uncooked rice
- 2 tbsp. extra-virgin olive oil, in addition to something else for sprinkling
- 1 medium onion, slashed
- 1 tbsp. tomato glue
- 3 cloves garlic, minced
- 1 lb. ground hamburger
- 1 (14.5-oz.) can diced tomatoes
- 1 tsp. dried oregano
- Fit salt
- Newly ground dark pepper
- 6 ringer peppers, tops and centers eliminated
- 1 c. destroyed Monterey jack
- Newly slashed parsley, for decorate
Guidelines
Preheat broiler to 400°. In a little pan, plan rice as indicated by bundle guidelines. In a huge skillet over medium hotness, heat oil. Cook onion until delicate, around 5 minutes. Mix in tomato glue and garlic and cook until fragrant, around brief more. Add ground hamburger and cook, separating meat with a wooden spoon, until as of now not pink, 6 minutes. Channel fat.
Return hamburger blend to skillet, then, at that point, mix in cooked rice and diced tomatoes. Season with oregano, salt, and pepper. Let stew until fluid has decreased marginally, around 5 minutes.
Place peppers cut side-up in a 9"- x-13" baking dish and sprinkle with oil. Spoon hamburger blend into each pepper and top with Monterey jack, then cover baking dish with foil.
Heat until peppers are delicate, around 35 minutes. Reveal and prepare until cheddar is effervescent, 10 minutes more. Shrimp-and-garlic-pizza.
Decorate with parsley before serving.Cool. Appreciate it!
Best Stuffed Peppers VIDEO
No comments:
Post a Comment